Prepare to take your cardmaking to heavenly levels! Jean Manis here to share three cards made with items in Simon's Space Experience Assortment from Spellbinders Paper Arts! The assortment incorporates a blend of kicks the bucket, a decorating envelope, and stencils, ideal for making mind boggling cards. Intended to work with the Simon Hurley - Platinum Scout Pass on Cutting and Embellishing Machine, the kicks the bucket in this assortment are loaded with subtleties that rejuvenate each space-themed component.
Read Also: Line Art Drawing Clipart Of A Lavender Plant Easy
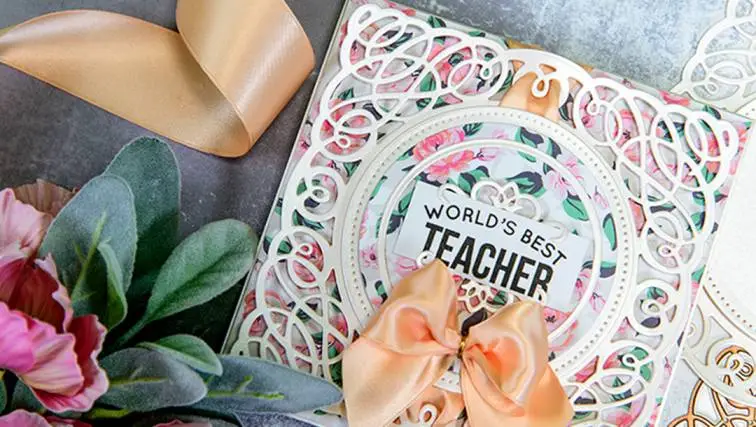
To the Moon: The Spellbinders Experience

Show your affection with a card that includes a rocket transport taking off toward the moon against a brilliant sky, matched with a genuine feeling.
Make an A2-size card base.
- Utilizing one of the star stencils in the Brilliant Night 3D Embellish and Cut and Stencil Pack.
- Cut rocket transport pieces from an assortment of cardstock varieties and surfaces with the To the Moon
- Apply Tricky When Wet glue to Snowdrift cardstock; put away to dry. When dry, cut stars involving a bite the dust in the To the Moon
- Apply Silver Lining glue to Snowdrift cardstock; put away to dry. When dry, cut moon involving a pass on in the To the Moon Connect to base piece, cut from dark cardstock with the extra moon bite the dust in the set.
- Cut opinion from Snowdrift and dim cardstock with bites the dust in the Space Good tidings Gather.
- Add collected moon and rocket boat to the card board with froth cement.
- Add the opinion with spot cement or paste. Discretionary: Add the feeling "And Back" to within the card.
- Stick pass on slice stars to the card.
Must Read: Modern Russian Attire From Peter In 1700s Clip Art
Alien Greetings Card
- Create a slimline card highlighting a UFO steered by a well disposed outsider to send a happy welcome.
- With the stencils in the Brilliant Night 3D Emblazon and Cut and Stencil Group, apply Pungent Sea, Tumbled Glass, and Shriveled Violet Misery
- Oxide inks to an Onyx cardstock board estimating somewhat bigger than 3 ½" x 7". When the three layers of stars have been applied, and the board is dry, cut the edge with the pass on in the Brilliant Night 3D Embellish and Cut and Stencil Group and trim as needs be.
- Trim the stenciled board as needs be and add to a cardstock base estimating 3 ½" x 7".
- Involving kicks the bucket in the UFO Companion set, cut the pieces for the planet, UFO, and outsider from an assortment of cardstock varieties and surfaces. Gather.
- Cut feeling from Snowdrift and Tidal pond cardstock with kicks the bucket in the Space Good tidings Gather.
Interstellar Friendship Card
- This slimline card features a UFO joined by two outsiders outfitted with space bubbles, set against a dry-embellished brilliant foundation and wrapped up with a straightforward yet happy opinion.
- With the Brilliant Night organizer, embellish and cut Illustrious Amethyst
- With the Brilliant Night organizer, embellish an Onyx cardstock board estimating 3 ½" x 7". Trim the Regal Amethyst piece and add to the Onyx
- Add gathering to a card base.
- Involving passes on in the UFO Companion set, cut the pieces for the UFO and outsiders from an assortment of cardstock tones and surfaces.
- Cut space rises with the base piece of the moon pass on in the To the Moon Collect UFO and outsiders.
- Hi Sly Companions, Heejung Hunsberger here! I'm excited to be returning as a visitor fashioner for Spellbinders Paper Arts this month once more! I think this assortment is ideally suited for the people who have children or grandkids who love space topics! I had a great time making the cards highlighting the Space Experience Spellbinders Paper Arts.
You May Also Like: Handmade Preschool Valentine Crafts For Parents
Love You to the Moon and Back
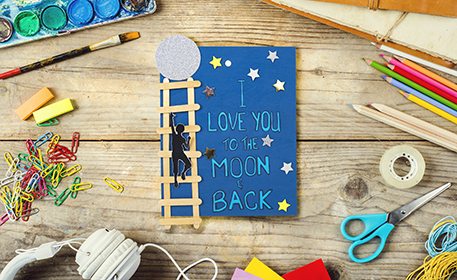
- Begin by removing the foundation utilizing a Starshine foundation bite the dust on dark brushed cardstock. The brushed cardstock has a slight shimmer, giving it a space-like feel contrasted with normal cardstock.
- Then, at that point, apply white paint with a brush to make a splattered impact.
- Remove the moon utilizing the To the Moon bite your preferred dust on the cardstock. Variety the moon with yellow ink to make a three-layered Spellbinders Paper Arts.
Space Birthday!
- In the first place, cut out the foundation utilizing a Starshine foundation bite the dust on white paper cardstock.
- What's more, blend dull blue, violet, and light blue ink and splatter it with a mixing brush.
Greetings Earthling
- To begin with, decorate an A2-sized indigo cardstock utilizing the Brilliant Night 3D embellishing organizer at a point.
- On the emblazoned paper, splash white pearl watercolors, and afterward join gold mirror cardstock stars to make the foundation.